Notion quickly became my favorite tool. As an engineer, I like tinkering with things, learning how they work, and making them work just the way I want them. Notion gives me that and more.
If you’re serious about automating Notion (you should, why bother doing things when the computer can do them for you?) — you will, at some point, encounter The Notion API.

So let’s sort of “make you an API” (you’ll learn how that is really called in a bit).
What is Notion? What’s an API?
You probably know what Notion is, but for Google to like me, I’ll include two sentences about it.
Notion’s website states:
Notion is a workspace that adapts to your needs. It’s as minimal or as powerful as you need it to be.
What that means is you get a note-taking app that’s so customizable that it can accommodate a workspace. Pretty powerful, if you ask me.
Now, with the more interesting question:
What’s an API?
You have heard about Web 3.0. That new* thing with the metaverse and the blockchain.
*Note: Lots of this has been in the works for quite some time; I’ve been working with VR from way before it had this weird “metaverse” name.
We’re not talking about that, but before we had Web 3.0 to work towards, we needed to have Web 2.0. Back then, APIs were cool. Not polished as a technology & certainly not safe. But cool.
Nowadays, we’re smarter about APIs, and we’ve made them considerably safer, more polished, and an essential part of some types of work. Like automation.
Okay, APIs are cool, but what of it? What’s an API?
An API is an Application Programming Interface. It allows different applications to talk to one another.
For example, you might want to try logging in to a website but realize:
“Oh, Woah, I just now realized I don’t want to put any effort in, pick a username, or remember a password.”
To your rescue, a social media login button appears:
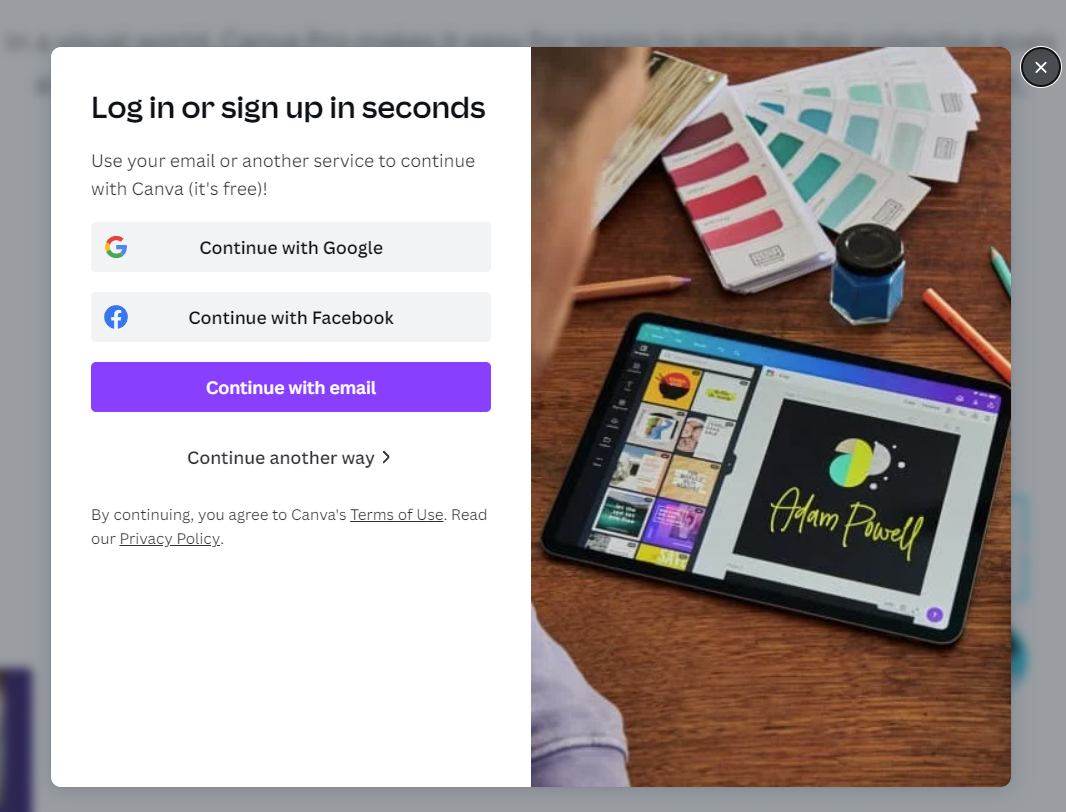
This is from Canva. Not affiliated, but I like Canva; I made the images for this post using Canva.
You click on a button, and wham-bam — you’re in!
Now, this casual experience is brought to you with the amazing help of APIs!
Basically, Canva’s API talks to Google’s (login) API — they split the work in half:
- Canva does its’ own thing — giving you a place design and whatnot.
- Google does its’ own thing — handling the login stuff, so Canva doesn’t have to.
This “websites talking to one-another” thing can be quite handy for Notion as well.
Here are a few examples of what’s possible:
- Get a Discord bot to talk to Notion — it might update a table with new members.
- Get an Apple Shortcut to talk to Notion — it might create notes in a database.
- Send email using Notion, sync Notion with other tools, or connect Notion to pretty much any website (remind me to write an article about that) — you can do a lot.
Here’s how to open up Notion’s API for you.
Getting access to the Notion API
What we learned from leaking everyone’s data everywhere in Web 2.0 was that APIs shouldn’t be too public. Notion follows that rule, and for you to access it — you need to create something called an Integration. This happens through a special developer-focused part of the Notion website.
Let’s get it done!
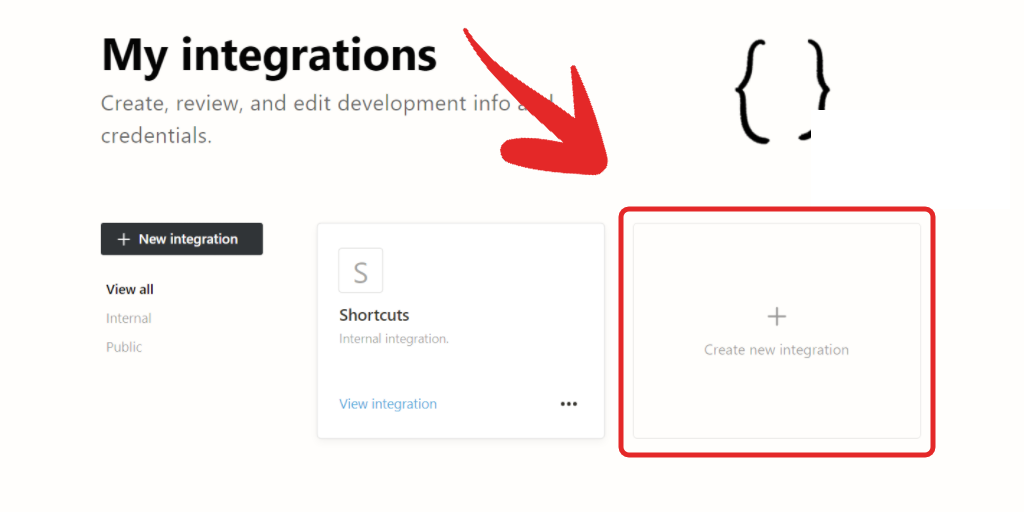
First, open the Developers Notion portal and click on view my integrations.
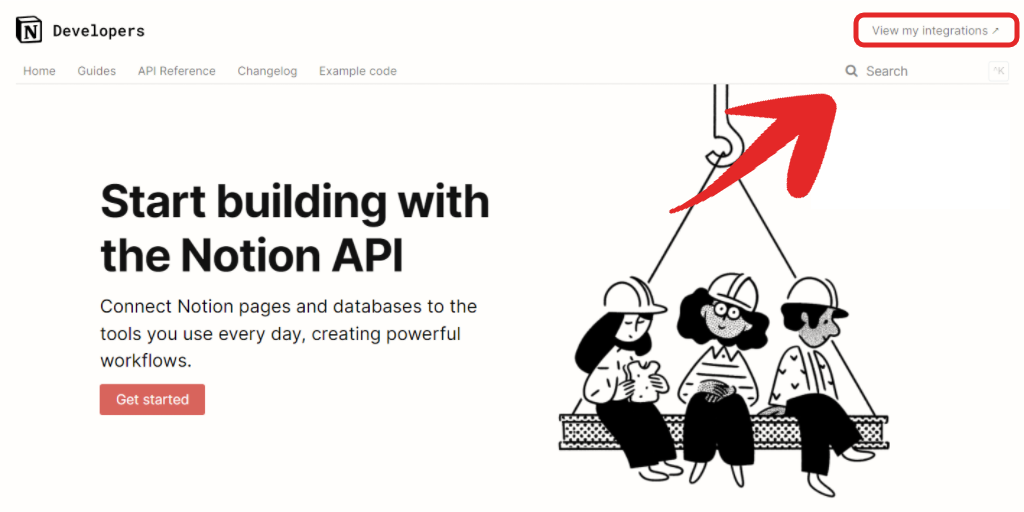
Login if needed, and you will be greeted with this screen:
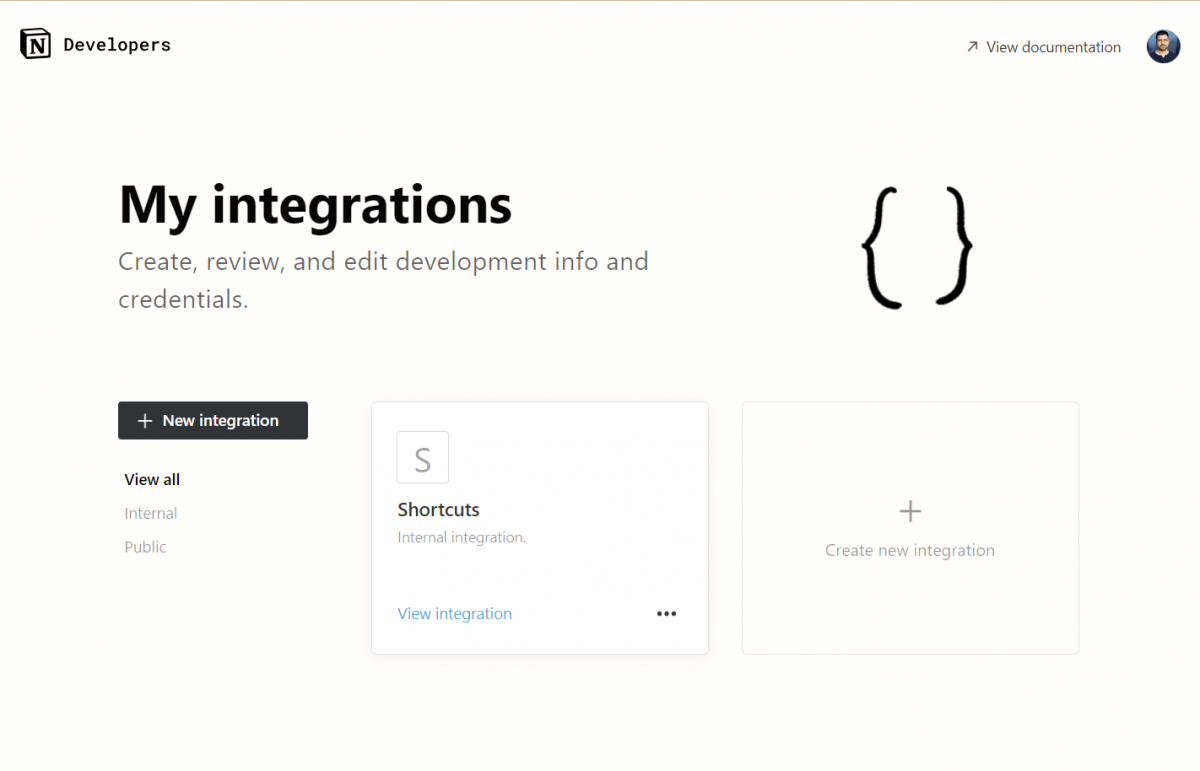
You won’t have an already made integration like my Shortcuts one, but you should click on Create new integration, and you’ll be there in no time.
So, why do you care about those “integrations”?
What are Notion Integrations
Here’s the explanation from the website:
“Notion integrations connect tools like Jira, Google Drive, and Slack to Notion, to help supercharge your workflow. Integrations are built using Notion’s API”
Here’s my explanation:
Anyhow, let’s create one.
You will be greeted with this screen:
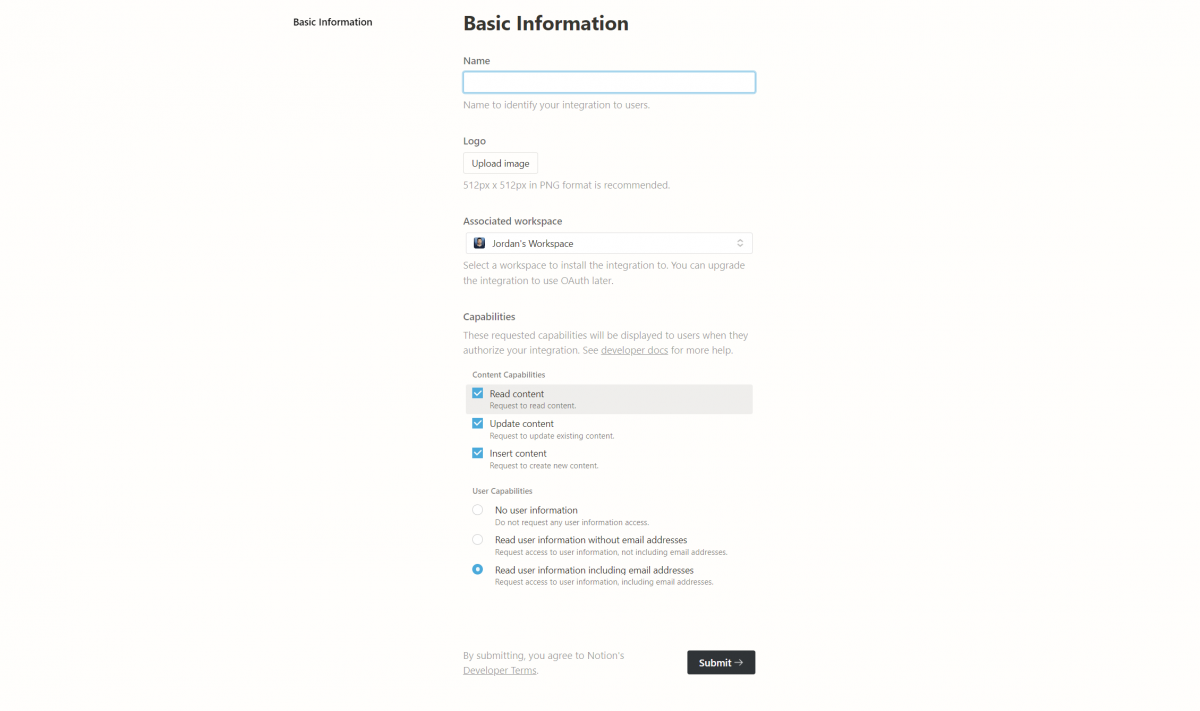
There are a few things to configure here:
- Name — just something you’ll remember. I’ll name mine Supertron because it’s a cool name.
- Logo — you’ll see this image for the integration. Same as the name, it’s here to help you remember what it is about.
- Associated Workspace — which Workspace should that integration live in. Unless you’re a power user, you probably have just one workspace, so you should be good. If you’re curious about what workspaces are, Notion’s Intro to workspaces is a great start.
- Capabilities — those are the security bits and pieces you care about. We’ll go into more detail for those momentarily.
The first few bits are basic customization, so I won’t go into detail, but we need to talk about the capabilities.
How to configure your Notion Integration’s Capabilities
Imagine integrations as another user (Mr. Supertron?) who has access to your Notion. You can manage that user and terminate its’ access whenever you want, but it doesn’t hurt to limit its’ access or capabilities to just what it needs.
Or, you know, skip all that and use the default settings, which give it full access. Up to you.
Let’s explore those capabilities.
First, we have Content Capabilities. What can that “user” do with your pages and databases?
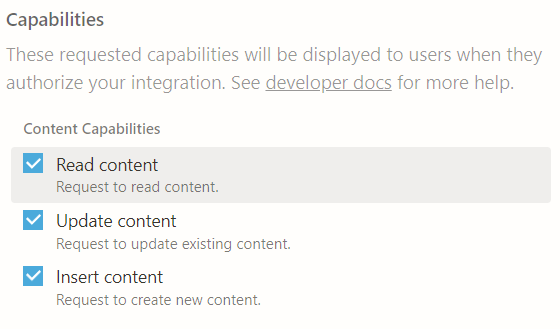
It might only need to read the data and report it somewhere else. Or change (update) the data in some way — change properties, change the text on pages, etc. Finally, it can insert content like database entries.
You most likely need the Read content capability, and depending on what your purpose is — you might want to check one or both of the other ones.
Next, we have User Capabilities. What info can our “user” get on other people using your Notion?
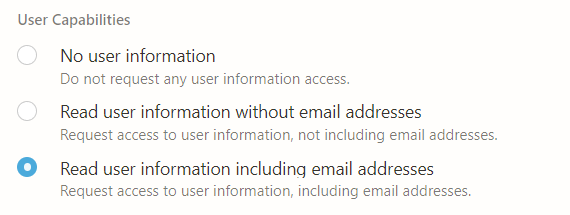
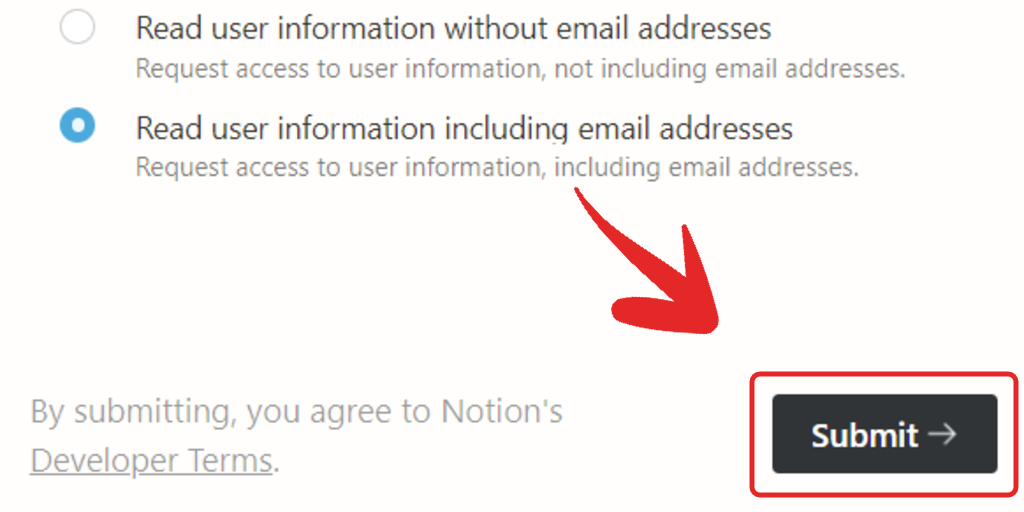
If you’re using Notion by yourself — you probably don’t care about this bit, so you can just press No user information. Otherwise, choose whether or not you want our “user” to have access to other, real users’ email addresses.
Creating and using your integration
You’re one click away from having your integration. Just hit Submit and let the magic happen.
And, here we have it — Supertron is alive!
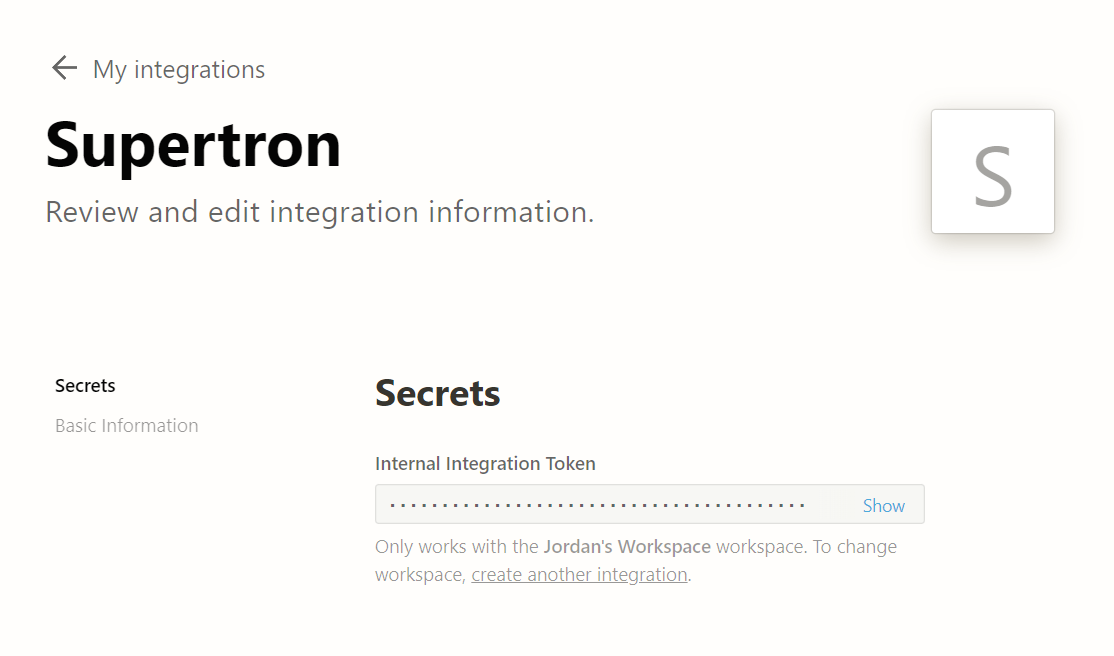
This is its’ page inside the developer portal, and inside, you can customize all the properties it has, and, more importantly, you can get its’ Internal Integration Token.
The Internal Integration Token
The internal integration token is simply a secret password that you can give other services to use your integration. It’s there to protect you from a random person with a computer online to use your integration and mess with your beautiful dashboard.
The Internal Integration Token IS your Notion API Key.
Finally, we have one other thing you need to know to use your integration successfully.
Sharing your databases/pages with your integration
You need to share your databases/pages with your integration. It’s in the title, yes.
Basically, your integration is still locked from accessing your content unless you explicitly share every page/database you want it to access with it.
This happens as you’d share any page with another user. Open the page you want access to & click the share menu:
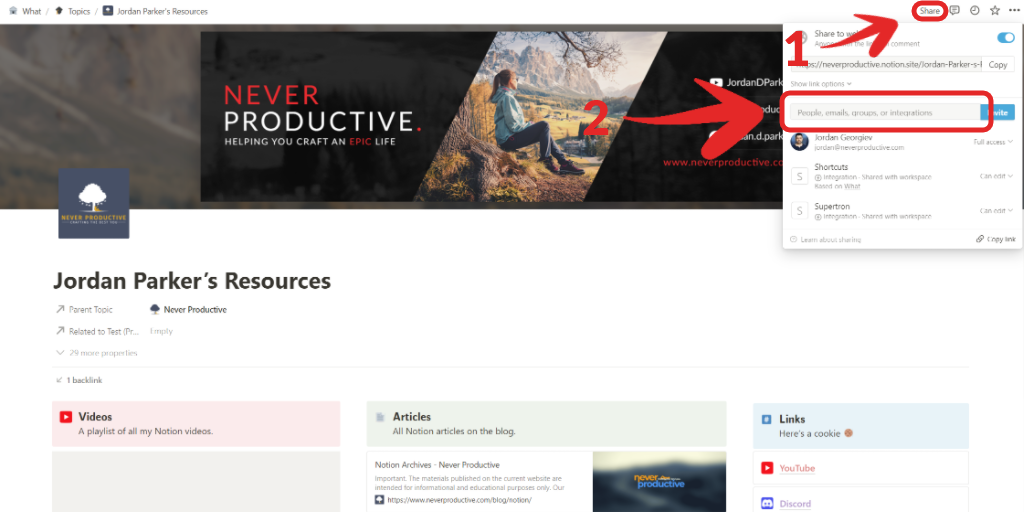
Then click on the People, emails, groups, or integrations bar highlighted above.
Write the name of your integration:
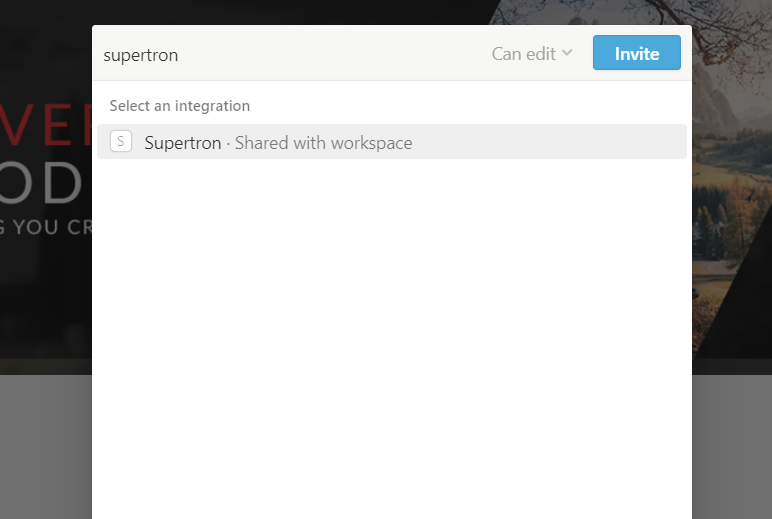
Click on it & then click Invite.
And there you go:
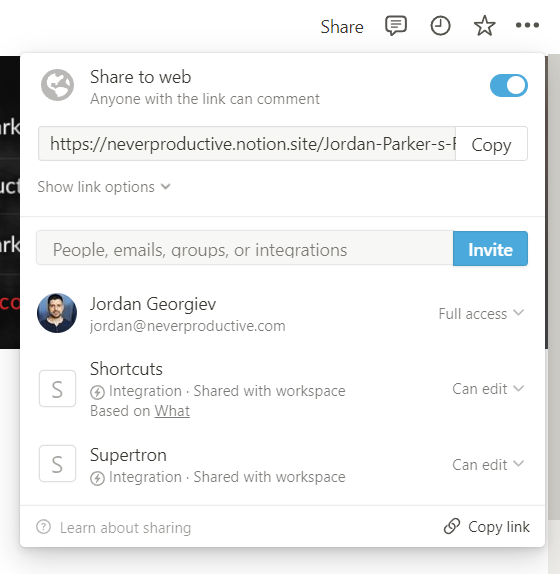
Now, your Notion integration is complete, and you can access Notion’s API using it!
Fin
That was you creating your very first Notion integration. It’s not too complicated, but I hope I gave you enough context so you can understand the ins and outs of it, plus, more importantly, the security behind it.
Here are some extra Notion resources to read next:
Or you can learn about The Advanced Pomodoro Technique if you feel like it.
Stay Awesome,
—Jordan


